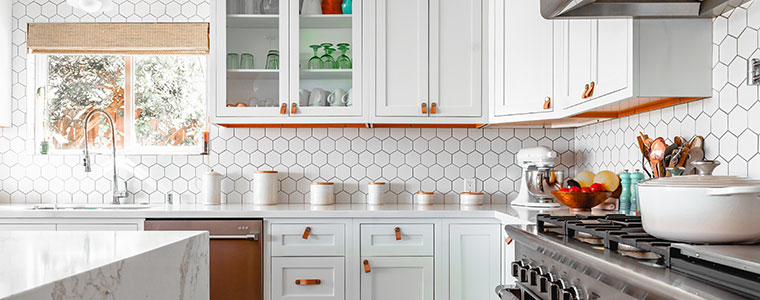
Your kitchen is one of the trickiest rooms in your house to pack. After all, it’s chock full of breakables—dishes, plates, and cups—plus items that need careful packing, like small appliances. Compare that with your bedroom and all its soft materials: pillows, bedding, linens, clothes and more. It’s easy to see why packing your kitchen can present a challenge.
If you’re doing a DIY move, we’ve got you covered. Below, you’ll find our best tips for packing your kitchen right. We’ll show you how to protect those fragile items so they arrive at your new place in perfect condition (and in an organized fashion)!
Start with the Right Materials
If you’re on a budget, it can be tempting to cheap-out on your materials. However, there are a few essentials that will make or break your kitchen move. These include:
Dish Packs
“Dish packs” are moving-industry speak for a specialized type of packing box constructed with a double layer of corrugated cardboard. The extra layer makes these boxes extra strong so they can better protect fragile items.
Yes, these boxes cost a little more than regular boxes. However, they’ll likely save you money in the long run by helping you get your kitchen items to your new home without any breakage.
What About Reusing Boxes?
If you’ve got boxes sitting around from your last move, you may consider putting them into the rotation. Or, maybe you visited your local liquor store to build up your stash.
Here’s the problem: Cardboard weakens every time you use it. And if you’re packing a container to travel thousands of miles to Hawaii, those boxes will be subject to some serious forces, leaving them likely to crush.
For that reason, we don’t recommend re-using boxes for packing a container to Hawaii. Get new boxes from a local moving company, a hardware store, or a mail and shipping outlet.
Cell Dividers
Now, along with your dish packs, you’ll also want to get a few cell dividers. You’ve probably seen these cardboard grids used in wine boxes to keep bottles from clinking against each other. You’ll need them for the same purpose. They’re great for packing glasses, mugs, and other small, fragile items.
Packing Paper
Packing paper is essentially unlined newsprint. It’s what the moving industry pros use to wrap and cushion fragile items. Yes, if you’re on a budget, you can use newspapers. However, the big advantage to buying packing paper is that there’s no ink to rub off on all of your items.
The #1 Rule of Packing Paper
It’s pretty simple: You can never use too much packing paper. Use it early, use it often. And if you’re ever in doubt, feel free to add a little bit more. It can’t hurt!
You should be able to buy packing paper at the same place you get your dish packs—a moving company, hardware store, or shipping store.
And Finally…
You’ll also need the usual suspects: packing tape and a few Sharpies for labeling your boxes. If you’re the organized type, you’ll also want a pen and paper to keep an inventory list. (Always a good idea!)
Now that you’ve got all the materials you need, let’s get into some packing tips.
Clean & Dry Everything First
Give yourself a fresh start at your new home. Make sure everything you pack is clean: no food debris, no lingering grease.
Then—and this is really important—make sure you dry everything thoroughly before packing it. Moisture can encourage mold growth. And since your items will be in a dark container for a few weeks, eliminate as much moisture as possible before bundling everything up.
Keep Yourself Organized
A little organization during the packing will go a long way toward getting you settled quickly in your new home. If you decide to create a full inventory list, more power to you. You’ll find it incredibly useful for keeping track of everything.
However, at the very least, don’t mix items from different rooms in the same box. And as you pack your kitchen, keep similar items together. For example:
- Pack all of your plates in the same box. (More on how to pack them below!)
- Put the beaters for your hand mixer in the same box as the appliance.
- Pair your Cuisinart with all of its accessories and bundle them in the same box, if possible.
Here’s where it will pay off: If you’re craving a smoothie at your new home, when you find the box marked “blender,” you’ll know the base, the pitcher, and the blade are waiting for you inside.
Pack Your Boxes Right
Now that you’re ready to pack your first boxes, we’ll show you our strategy for getting it done. Follow these steps to give your items the cushioning and protection they need while they travel over the Pacific Ocean.
Step 1: Create a Base Layer
Crumple up a few sheets of packing paper, then stuff them in the bottom of the box. Repeat until you’ve created a 1-2″ layer of cushioning.
Step 2: Wrap!
Take a few more sheets of paper and lay them out on a flat surface, like your counter. Place your item in one corner, and wrap the item in paper diagonally. Tuck in those edges as you roll.
Do Your Future Self a Favor
In addition to breakables, your kitchen also contains sharp objects, like knives and blender blades. When you’re wrapping these items, keep your future self in mind.
Here’s what we mean by that: Pack any sharp objects so that if someone reaches into a box blindly they won’t get accidentally cut. For example, wrap knives in a kitchen towel, then wrap the bundle in packing paper. For a blender blade, wrap it in paper, then put it inside the blender pitcher, then wrap the whole pitcher in paper.
Step 3: For Nesting Items
For identical items like plates or bowls, wrap them in bundles. Once you’ve wrapped one plate, lay out a few more sheets of packing paper. Place your wrapped plate in the corner. Then, place the new plate on top and wrap the two of them together. Repeat with another 1-2 plates. Then wrap the whole bundle in paper and tape it all together.
Bowls can get the same treatment, but don’t wrap more than 2-3 of them in a bundle.
Step 4: Fill the Box
Don’t leave any open spaces in your box. This means room for items to move around. It also makes your box more susceptible to crushing. There’s no need to squish or squeeze items together, though. Use as much of the box as you can, leaving 1-2″ at the top. Then, fill any open spaces with crumpled packing paper.
Hint: If items are bumping around or not fitting snugly, remember the #1 rule of packing paper. Add more crumpled paper between them.
Step 5: Create a Top Cushion
Once everything is firmly in place, it’s time for the final touch. Just as you did on the bottom, create some extra cushion at the top of your box. Crumple enough packing paper to create a 1-2″ top layer that will give your box one more layer of protection.
Two Final Tips
At this point, you’re ready to attack your kitchen in earnest. But before we let you go, we’ve got two final tips for packing your kitchen.
Tip #1: If any of your appliances run on batteries, remove them before packing. You don’t want those appliances accidentally turning on in transit—or leaking!
Tip #2: And, finally, as you’re packing, don’t let any one box get too heavy. Yes, we did tell you to fill those boxes. However, try to distribute heavy items so no one box weighs too much. Super-heavy boxes are difficult to carry—and easy to drop. They also have the potential to crush other boxes. So, as much as you can, split up heavy items.
Moving Your Kitchen Easily—and Safely
In addition to all the items we mentioned above, the most important asset you’ll want when packing your kitchen is time. Give yourself plenty of it so that you can tackle your kitchen in a calm and organized fashion, deliberately bundling everything neatly for its journey. Not only will this make the process easier, but it will also make it more enjoyable.
Moving all of your possessions to Hawaii? Get a free quote from us for your move. We’ve got the best rates on DIY moves to Hawaii—and we know how to do them right.
Tell us about your move!


