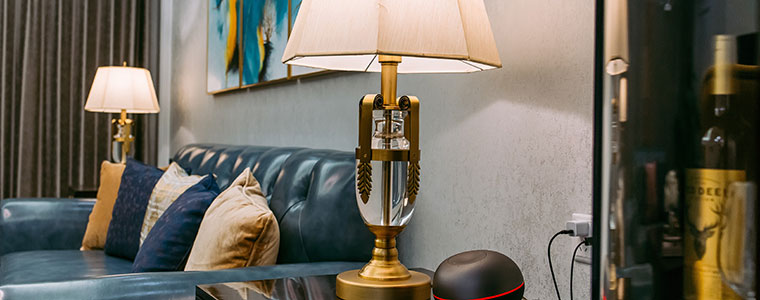
Let’s face it. Some of your belongings are harder to move than others. Sometimes, it’s because they’re fragile. Other times, it’s because they’re oversized or oddly-shaped.
Lamps fall squarely into this category of hard-to-pack items. After all:
- Each lamp has its own unique shape.
- Lamp shades can be easily crushed if they’re not packed correctly.
- Plus, lamp bases are often made of fragile materials, like porcelain, pottery, or glass.
Given all this potential for breakage and damage, you want to be particularly careful with how you pack your lamps. This is especially true if you’re shipping a container to Hawaii, which will travel thousands of miles before reaching your new home.
To help you get your lamps to Hawaii quickly, safely, and easily, our pros will show you how it’s done. Follow along with this step-by-step guide so you can pack your lamps like a moving professional for your DIY move.
Start by Gathering Your Materials
First and foremost, you’ll want to make sure you have all the right packing materials to do the job well.
We recommend the following:
- Packing paper – Unprinted newsprint, available at hardware stores or online. Never use newsprint with lampshades. The ink can rub off and ruin them very quickly!
- Bubble wrap – This is optional. Some people like having the extra protection for especially delicate lamps.
- A few Ziploc bags – These will keep you organized and save you time when you’re reassembling your lamps.
- A few moving boxes – If your lamps are particularly delicate, you may want one for each lamp base and one for each lamp shade. Sometimes, though, you can combine a few in a box. More on that in a moment!
- Packing tape to seal each box.
- A Sharpie for labeling.
Now, let’s walk through the process together.
Step 1: Disassemble the Lamp
If you’re moving down the street, disassembling every lamp might be overkill. However, when you’re sending a container to Hawaii, you want to do everything by the book. Otherwise, your lamp may arrive broken, bent, or misshapen.
Start by taking your lamp apart:
Tip: Only do one lamp at a time. In the chaos of a move, it’s easy for little parts to go missing—unless you stay organized. Only disassemble one lamp at a time. Have a Ziploc bag ready to catch each piece as it comes off the lamp. (And don’t mix parts from multiple lamps in this bag! It will only create a headache for you on the other end!)
- If there’s a finial at the top—that decorative piece that holds a lampshade in place—unscrew it and drop it in your Ziploc.
- If there’s a shade riser beneath it, do the same.
- Remove the lampshade and set it aside.
- Unscrew the lightbulb.
- If your lamp has a harp—that’s the metal halo that goes around the bulb and holds up the lampshade—take it apart as much as you can and put the pieces in the Ziplock.
Then, seal up the Ziplock and label it with the Sharpie. Keep it close because you’re going to pack it with the lamp. The more you can keep pieces like this together, the easier the unpacking at the other end.
Step 2: Pack the Base
Once you’ve disassembled as much of the lamp as possible, it’s time to prep it for its journey.
First, Secure the Cord
You can either:
- Wrap it around the base and tuck the plug underneath the cord. Consider securing it with a piece of blue painter’s tape if needed.
- Neatly fold it up. Secure your bundled cord with a rubber band or a twist-tie.
Don’t use packing tape to secure your cord. It can leave a sticky residue on your cord or your lamp.
Then, Take Your Packing Paper and Wrap It Around Your Lamp
If the lamp is small enough, you can wrap it on a flat surface. Lay out a couple of sheets of packing paper on your dining room table, for example. Lay the lamp down in one corner. Wrap the paper diagonally around the lamp and tuck in the edges as you go.
Give It Some Extra Cushioning
If your lamp is delicate, repeat this process with a few more pieces of packing paper. Truthfully, you can really never use too much packing paper. So, when in doubt, add a little more.
If your lamp is extremely fragile, you might consider also wrapping it in a layer of bubble wrap, then securing that bubble wrap with packing tape.
Make One Final Assessment
As we said, lamps come in all shapes and sizes, so you may have some areas that stick out after wrapping your lamp in packing paper. Fold or crumple some packing paper over these areas so the entire lamp is cushioned.
If you’ve decided to bundle the cord separately, wrap some paper around the cord, too.
Your ultimate goal is to create a bundle that’s protected from all angles.
Place the Base in Its Box
Start by putting a layer of crumpled paper in the bottom of your box to give your lamp a nice layer of cushioning.
Next, you’re going to need to make a judgment call. If you’re dealing with an extremely fragile lamp, you may simply want to give it its own box. If your lamp is a little more sturdy—and there’s a lot of room in the box—you may be able to fit more than one base in the box. Ultimately, it’s up to you. If you’ve wrapped your lamps securely and you don’t have to squish them in order to fit, you can put more than one in a box.
At this point, you’ll also want to take that Ziploc bag with the lamp hardware. Wrap it in packing paper and stick it in the box with the base.
Mind the Gaps
Whether you decide to give each lamp its own dedicated box or double up, the last thing you need to do is fill the box with crumpled packing paper to keep the contents from shifting. Surround the lamp base(s) with as much paper as you think is necessary, then pick up the box and give it a gentle shake. If anything moves, add more paper.
Once everything is secure, add a layer of crumpled paper at the top of the box, just as you did at the bottom.
Seal and Label
Once you’ve got the lamp base secure, seal the box with packing tape, and label it with your Sharpie. Make sure to write FRAGILE on the box so you’ll know not to pack it on the bottom of a heavy stack of boxes.
Next, it’s time to . . .
Step 2: Secure the Shade
Select a Box That’s Big Enough
First and foremost, make sure you’ve got a box that will comfortably fit your lampshade with a few inches of room on each side. If you try to squash your lampshade in a box that’s too small, you’ll likely damage it.
Pack It Right
Start with a layer of crumpled paper in the bottom of the box. Then, gently wrap your lampshade in packing paper. However, don’t cover over the bottom opening of the lampshade in case you decide to nest another shade inside it. (More on that below!)
If needed, you can use some tape to secure the packing paper to itself. However, make sure not to attach the tape to the shade. Then, turn the shade upside down and place it in the box.
Decide Whether to Nest—or Not to Nest
As with your lamp base, you’ll have to make a judgment call here. If there’s enough room, you may be able to nest another shade inside this one. If you go that route, make sure there’s enough packing paper between shades to protect them both. Additionally, make sure that the nested shade isn’t poking out beyond the boundaries of the box.
Mind the Gaps (Again)
As you did with the base, you’ll need to fill the box with crumpled packing paper to make sure the shade doesn’t shift in its box during transit.
If you’ve nested shades, when you do the shake test, pay attention to whether the nested shades move. If so, crumple some more packing paper between them.
Seal and Label
Once you’ve got the lamp base secure in the box, seal the box with packing tape, and label it with your Sharpie. Make sure to mark it FRAGILE.
Tip: Label carefully. Make sure it’s easy to tell from your labeling which shade belongs to which lamp. There’s nothing more frustrating than opening a bunch of wrong boxes while looking for the right lampshade.
Rinse & Repeat
Continue this process for each lamp in your house. With some patience, some careful packing, and a lot of packing paper, you’ll get all your lamps packed and ready to go to Hawaii. Plus, you’ll also finish with the confidence that your lamps will be well protected for their long journey to the Aloha State.
Ready to Book Your Container for Your Hawaii Move?
If you’re doing a DIY move to Hawaii, we can get you the best rate available for your container move. We specialize in affordable self-service moves, and, with three decades of experience in Hawaii moves, we’ll make sure your move is done right. Just reach out for a free quote to get started.
Tell us about your move!


